I gave Beau a much-deserved day off recently. … And then I decided to take the doors off the Oro Kelso Dino. I needed a little help so I called on my most reliable helper… my wife, Carolyn. She did a pretty good job pulling the Keeper Clips off the door pins. Something I couldn’t see without my glasses.


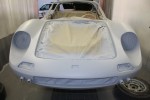

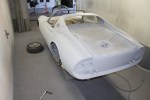
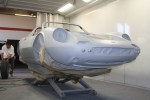
It’s a great feeling to be in your last primer stage!
The next step is pulling the doors and prepping the body and door jams for color. Then the body and parts get guide coated and ready for the final blocking in 400 wet.
Something was a bit suspicious when we saw the lower rear quarter panels with a thin skim coat of filler over bubbled rust. It seemed like someone was trying to hide something. We could tell immediately that it had to come out. It wasn’t until we peeled back the metal that we saw what lurked beneath.


You can see here that we peeled the metal back to expose old patch jobs, some rust and gunk.

“Treasure!” Once the mess was fully exposed we found a tool from the last body man to work on this area of the car. I’m sure he’s still wondering where his box wrench went… Obviously this all gets cleaned up and new sheet metal is fabricated and installed.

Tucked inside the lower rear quarter panel was the “calling card” of the last place to fix the lower rear quarter.

Here’s our finished results. New sheet metal installed and seam sealed, then a coat of Wurth Stone Guard undercoat (great product but a little pricey).
As we all know, this area is dual paneled. So, for extra precaution and longer rust protection, we plugged the outer factory drain hole at the bottom in the corner and poured a gallon of a rust preventative liquid material down inside, then pulled the plug and let it all drain out. I’ve never done that before but I think it may be my standard procedure from now on. It really worked well! It only makes sense that it would coat inside completely. I wish I had some photos to share with you of the procedure but… as I was taking photos my phone slipped down inside the panels and was submerged in rust preventative. I got my phone back but it was ruined and the photos were lost.

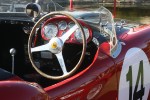
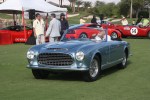
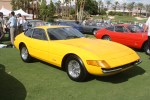
Beau and I took a half a day off to go to the 2012 Ferrari Club of America’s International Meet at the Hyatt Regency in Indian Wells. It was raining very heavily in Orange County when we left but by the time we got to Indian Wells the weather was sunny and warm … perfect weather for a Ferrari show.
We ran into a lot of friends and acquaintances. There were some really nicely restored old classics. The event is going on through Sunday and is packed with special races, tours, and seminars. Here’s a few photos from today’s Concours.


We pulled the suspension.. We just got some parts back from the powder-coater. Whatever couldn’t be powder-coated was painted with wet material, baked and we’ll be installing it tomorrow. The shocks tested to be in good shape, so we reconditioned them.

We got the front bonnet, engine cover, and deck lid back from the media blaster. We were surprised to see that the grease pencil the Italian craftsmen used in the factory to mark the parts were etched in the metal. It’s sad we have to cover it up.


We’ve metal prepped the parts and sealed them with a DTM 2K Primer Sealer. Once dried we then ran seam sealer at the edges where the sheet metal is folded over as well as both sides of the framing. It is a proven fact that seam sealer will adhere and work better if it’s done after your primer stage.


We received the car back from Gran Turismo – less the motor – the Dino went through a second de-grease, pressure wash and steam cleaning. This is where we pull all the inner wheel wells and see what’s lurking behind. Low and behold we found a little something. Seems like a mouse chose his new home well and stored up nuts for the winter.

Mouse nest aside, this additional cleaning process is important because we can get in to areas we couldn’t reach with the motor in. It allows for a deeper cleaning. We pulled the gas tanks and pressure washed them so they could be refurbished. After the car went through this phase we spent more than two hours blowing every drop of water out of the nooks and crannies. Then the car went into the spray booth oven where we baked the car to guarantee all the moisture is gone. Following this process, we sprayed a rust encapsulator everywhere – inside doors, inside lower rocker panels, inside quarter panels, and inside front nose. Then it returned to the spray booth for a final baking.


Now we can address any hidden damage we found and start refurbishing. It’s a great feeling to get this segment done because it’s like having a clean canvas to start your work. We will start with pulling the suspension down and sending it to the powder-coater. The three major parts – front bonnet, engine cover, and deck lid – will need to be sent to the media blaster because of the thick undercoat that was previously applied to the undersides of each of these parts. It has to be removed and it should not be done with a liquid stripper. I find that walnut stripping is the best and most effective way to do this job correctly.

Mechanical
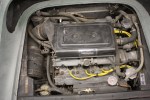
The owner of the Dino 246 GTS “Oro Kelso” asked that the motor be refurbished while we work on the body, surface and paint. His friend recommended a shop in L.A. that specializes in European mechanical servicing. Gran Turismo of Los Angeles is owned and operated by Felippo Cusimano and his son Giovanni. They’ve pulled the motor at their shop and will be making the necessary repairs prior to installation. I understand that the compression test was perfect.


Two good friends each bought a 246 GTS. The friends want to see their cars transformed into the beauties they were from the factory and then to enjoy their cars together. The two friends decide to restore their respective Dinos. They even want to bring them back to their original colors. We are very lucky to be selected and very excited to have an opportunity to work with these two good friends in the refurbishment of their Dinos. We will be making repairs, re-surface and paint the two Dinos. One of the friends’ cars hasn’t been delivered to us yet. So, we’ve started on the one friend’s Dino 246 GTS.

We’re bringing this Dino 246 GTS back to its original color. Actually it’s the color that makes it very rare and special. During our research phase we discovered, through Matthias (http://www.dino-book.com/), that the paint on this car was actually a very limited Pininfarina color option. There were only a few Dinos painted with special colors, some of these were from the Pininfarina color chart of paints. Twenty-eight (28) Dinos — to be exact — were painted in these special colors. Of those 28, only three were painted with Pininfarina’s “Oro Kelso” gold.
Pick Up
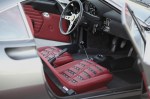
We picked this Dino up at a shop on the Central Coast of California. The car was partially dismantled and slated to be repainted. It’s a very clean, low mileage Dino with minimal repairs needed. Nevertheless we have our work cut out for us as we fabricate Euro-style lights and manage a bit of body repairs.


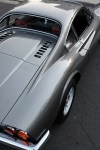
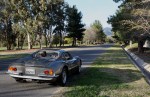
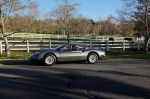
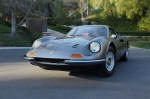
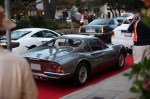
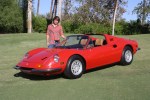
We completed the surface and paint on this Dino 246 GT a while back… about a year and a half ago. We re-surfaced and painted it in a gorgeous Grigio Ferro. It’s really a head turner as you can see by the red carpet treatment it received somewhere up in Monterey during the Pebble Beach Concours d’Elegance in August. It was also awarded Best of Show at the 2012 San Diego Bella Italia. The 600 hours of prep, surfacing and painting really shine through.
Thanks to Tom K for the great photos of his Dino. Well done! Always a pleasure to work with you.